Monday, June 7, 2010

Cooking Perfect stove top rice

I've been meaning to post a stove top version of Japanese rice since I first posted the electric rice cooker post. How can you build a meal without rice?

There is a science to cooking rice and I'll try to explain it using a graph. You should note that controlling the heat is the most difficult part of cooking stove top rice. Refer to the size and pot chart for additional tips.

Ingredients
2+(1/4) cups of Japanese medium grain rice (this is equivalent to 3 cups in Japanese units
2+(1/4) cups of purified water*
Clay pot

1) Wash rice according to the cooking with an electric rice cooker directions. Drain water with a colander.
2) Add the rice and purified water to the pot and soak for at least 30 minutes. (During the summer or warm climates 3o minutes, during the winter or dry or cold climates 1 hour).
3) Turn on the stove on to medium heat and slowly bring to a boil. The rice should reach boiling at exactly 10 minutes.
4) Turn down the heat to low and simmer for 15 minutes.
5) Turn off the heat and steam for 10-15 minutes.

If you want to add okoge (crunchy toasted rice) to the bottom of the clay pot, you'll want to turn the heat up to high for 1 minute before you turn the stove off.

*The rice to water ratio is about 1:1.2 but since the rice absorbs some water when you wash it, it will end up being 1:1.

Easy Directions in a graph:


This chart lists the various options you have for cooking stove top rice.


After washing rice, drain and immediately add to the pot and add water.


I used a clay pot.


Add purified water to the pot.


Soak the rice in the water for 30 minutes to an hour.


Make sure the heat is on low so that the rice doesn't dry out for step 4.


Fluffy fragrant rice. I did added the okoge step.


Mmmmm Okoge...tastes like senbei (Japanese rice cracker).


One more graph to go. Will post that later this weekend. :)

Sunday, June 6, 2010

Wakame furikake

Fukikake and rice. It's the easiest meal I can think of. When I was in school, I would often mix my furikake and rice and make an onigiri. The fancy furikake in the refrigerated section in Japanese stores isn't cheap. The other day I was wondering around a grocery store and had a craving for fresh furikake and ended up paying 5 dollars for one tiny 1.7 oz. (50gram) bag.

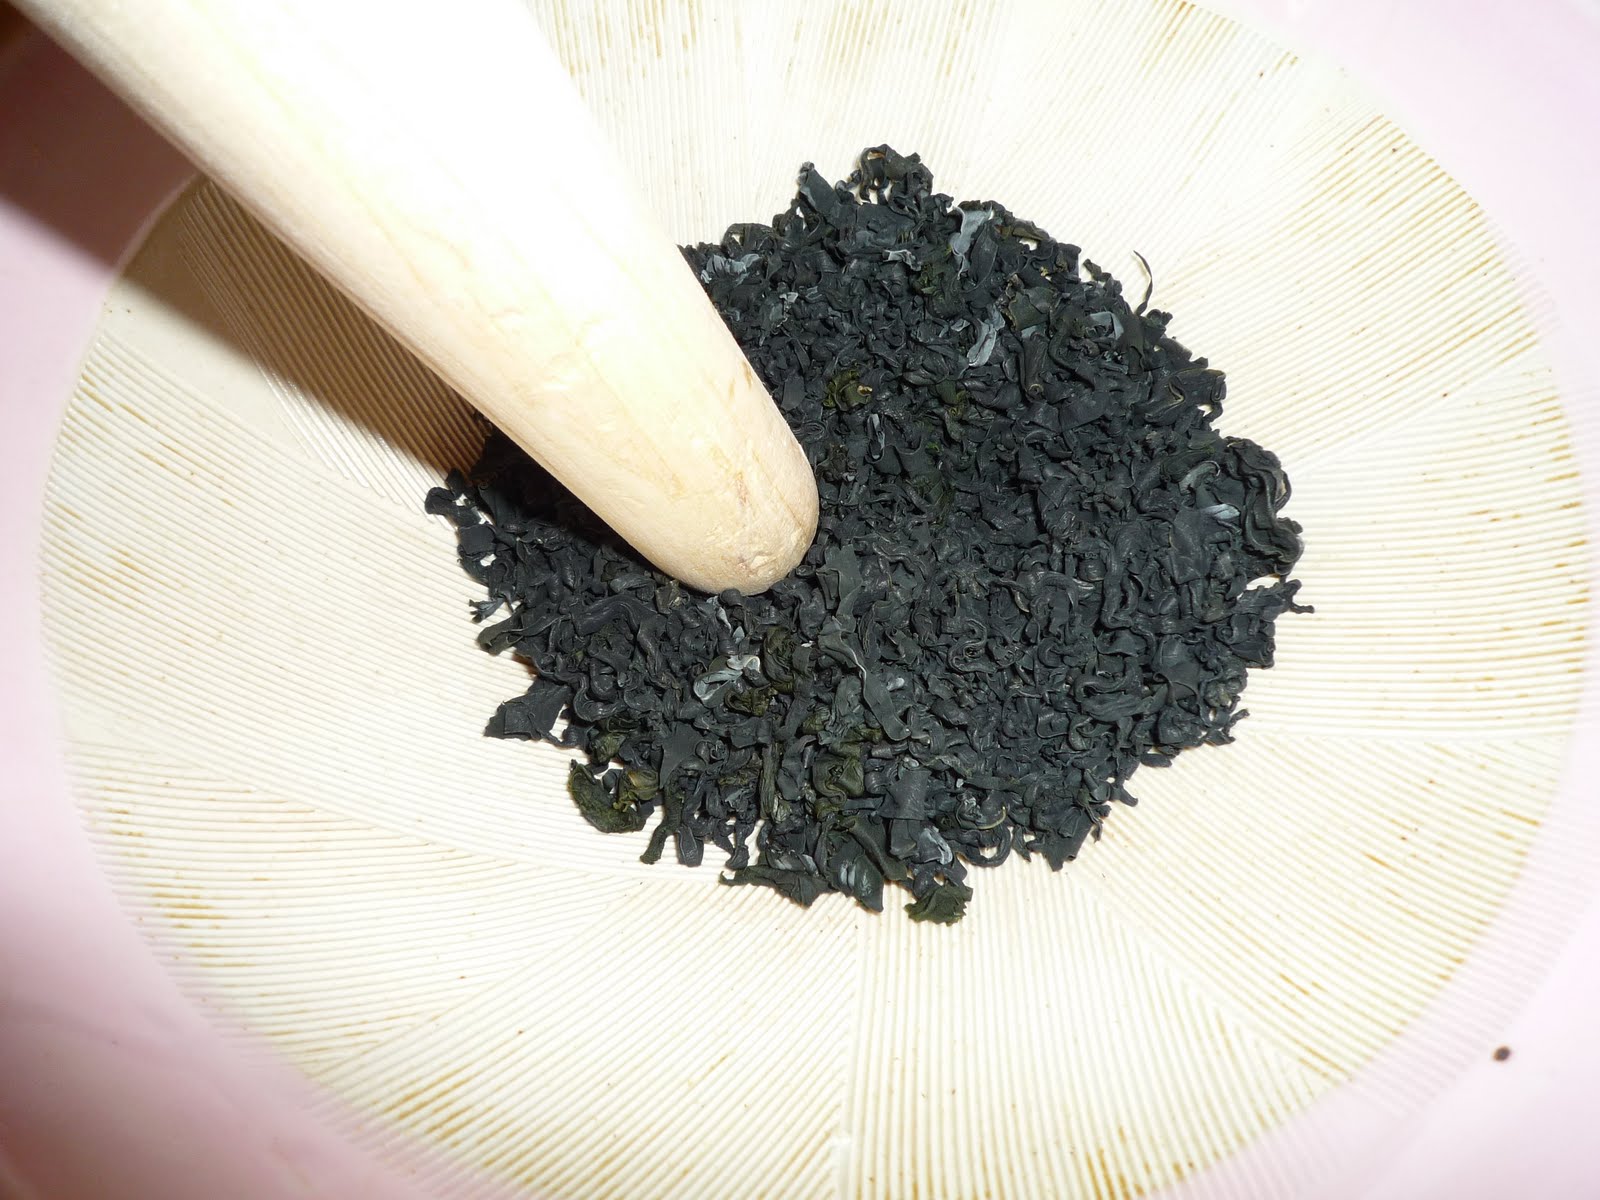
I decided it was time to start making my own furikake. It's simple and hardly takes any effort at all. Plus you can use a mallet or surikogi (Japanese pestle) to mash it up and that's always fun. This furikake has two types of seaweed and served on a steaming bowl of white rice, reminds me of the ocean.

Ingredients
3/4 cup of dried wakame (seedweed) They come pre cut in plastic bags.
2 teaspoons of soy sauce
1 teaspoon of mirin
1 tablespoon of toasted white or golden sesame seeds
1 tablespoon of aonori (another variety of dried seaweed)
1 teaspoon of sugar
1/4 teaspoon of sea salt (optional)

1) Put the wakame into a plastic ziplock bag and smash it with a mallet or surikogi stick. If you have a mortar and pestle that works well also.
2) Use a non stick frying pan and on low heat add the wakame and toast for about 1 minute.
3) Turn off the stove and add the soy sauce, mirin and continue to toast with a wooden spoon.
4) Add the sesame seeds and stir.
5) Let cool a bit and add the aonori and sugar.
6) Cool completely and store in an air tight tight container.

Serve on a steaming bowl of rice to release the oceany goodness of the seaweed.

I'm using a Japanese mortar and pestle. Use your free hand to shield the pieces from flying out. You can use the plastic bag but I'm trying to be a little green.


Crush into small pieces. You don't want large chunks.


Add the sesame seeds.


Add the aonori.


Serve with a hot bowl of rice.


You can also mix it into a bowl of hot rice, salt your hands with sea salt and ball it up into a musubi (Japanese rice ball).

Saturday, June 5, 2010

Wafu Pasta 1: Shiso Ume Garlic Spaghetti with a kick (Vegan friendly :) )

I'm a big fan of Italian food! One of these days I will eat my way through Italy. In general, Japanese people love Italian food and you'll often find Wafu (Japanese style) pasta dishes at Italian restaurants.

This wafu pasta isn't a classic wafu pasta but it uses very Japanese ingredients such as shiso and umeboshi that make it wafu.

Ingredients
1/2 teaspoon of kombu cha (powdered kombu flavor)
1/2 teaspoon of salt
1/2 tablespoon of minced umeboshi
1 tablespoon of minced garlic
7 shiso leaves
1 teaspoon of extra virgin olive oil
1/4 cup of pasta water
sprinkling of sliced chili peppers
350 grams of spaghetti noodles (a little bit less than a 1 lbs bag)

1) Boil your water and add salt.
2) Boil your pasta about 1 minute less than the directions on the package. You don't want it to be hard but a little extra aldente.
3) Reserve 1/4 cup of the pasta water and drain the rest of the pasta.
4) Heat a large frying pan and add the olive oil, chili peppers and garlic.
5) Add the pasta and stir fry, making sure that the garlic doesn't burn.
6) Add the pasta water, umeboshi, salt and kombu cha.
7) Plate and top generously with shiso.

Stack the shiso leaves.


Roll up your shiso like a...uhhh anyway roll 'em up and hold it down with your fingers.


Slice them into thin strips.


Peel off the bainiku and mince it until it looks like this.


Drain your pasta and massage with with cold water.


When the pasta is almost done, start heating up a pan. When the pasta is drained, add the olive oil and chili's to the pan.


Add the garlic, give it a quick stir and add the pasta.


Add the bainiku (umeboshi), salt, kombu powder and pasta water and mix well.


Top with shiso and mix it in as you eat.

Friday, June 4, 2010

Ingredient in the Spotlight: Shiso (Beefsteak Plant)

Shiso are beautiful full leaves with a bright green color that reminds me of spring. They also come in a reddish purple variety that is often use to make umeboshi (pickled plums). Not only is it used to flavor the umeboshi, but the shiso give it a bright red color. It's without a doubt my favorite Japanese herb. They often make an appearance as a garnish on sushi platters in America but shiso is much much more than a garnish. It has a delicate sweet flavor that perfumes and compliments many Japanese dishes. It's like cilantro and Mexican food or basil and Thai food. I have already used it in my fancy sushi tsukemono but it will definitely continue to make an appearance in recipes to come.

Multiple shiso leaves.


Single leaf.

Thursday, June 3, 2010

Daikon Miso Soup

By now, you've probably got miso soup down and you're probably asking yourself how many types of miso soup are there. I have no idea. I just wanted to post enough recipes that you'll have enough to rotate them so you don't get bored.

Here's Daikon Miso Soup! BAM 8 Done!

Ingredients:
(servings 2)
2 inches of a small daikon or just use half of a large daikon
2 Tablespoons +1 teaspoon of miso
2 cups nibandashi

1) Make nibandashi or you can use ichibandashi. As a substitute you can use 2 cups of water and 1/4 teaspoon of dashi powder.
2) Add the daikon and simmer until the daikon is tender.
3) Add the miso and put the miso in a ladle and use chop sticks or something to dissolve the miso before adding it directly to the soup.


Cut off 2 inches of a small daikon. If you have a large daikon cut off 2 inches but just use half of it.


Cut 1/8 of an inch slices.


Line them up and slice into Julienne slices.


Simmer the daikon before you add the miso.


Daikon Miso soup served.

Wednesday, June 2, 2010

Everybody's favorite Crispy Chicken katsu

I try to stay away from too much fried food but every now and then I have a huge craving for fried chicken and I don't mean KFC. I like 'em breaded and fried, ever heard of chicken katsu? For those of you who didn't get that, I'm sort of a movie quoter. "I like 'em dead and deep fried, ever heard of Popeyes? You gotta love Chris Rock. I digress...so back to the katsu. Tonkatsu (pork cutlet) is of course the classic fried and breaded meat but I really like chicken katsu. I find that you can't really go wrong with chicken katsu and the meat tends to stay moist.

This recipe is also a simple, no hassle and easy clean-up recipe. I don't bother dipping the meat into flour, eggs and then bread crumbs like a lot of recipes call for and this comes out crispier even after it cools down.

Ingredients
3/4 cup of water
1 teaspoon of vinegar
1/3 cup + 3 tablespoons of flour
1 (1/2) pounds of chicken thighs
2 cups of panko bread crumbs
Canola oil
salt and pepper

1) Use boneless and skinless chicken thighs. The dark meat helps keep the meat moist. Make sure you cut off all the fat. Lay them on a chopping board and lay a piece of plastic wrap over them.
2) Use a meat tenderizer or a rolling pin or the bottom of a skillet and try to make the meat an even thickness so that it can cook evenly in a frying pan.
3) Sprinkle salt and pepper on both sides.
4) In a mixing bowl, add the water and vinegar. The vinegar is what makes it nice and crispy. Don't add the flour to the water first.
5) Whisk in the four until you have a nice smooth batter.
6) Dip the chicken in one at a time and then dip into panko crumbs and press lightly on both sides.
7) Heat a hot frying pan. You don't need to use a whole bottle or even a half a bottle of canola oil to get a nice crispy chicken katsu or have to deal with the mess of disposing it later. Add 1/4-1/3 a cup of canola oil to the pan and fry the chicken on both sides.
8) Fry both sides on med-low heat for 3-5 minutes on both sides until golden brown.

Serve with thinly sliced cabbage, rice and tonkatsu sauce and some sort of miso soup. I'll be making daikon miso soup tomorrow.

Use dark meat chicken and trim off all the fat.


Cover with plastic wrap.


This is what it looks like when it's tenderized.


Season with good sea salt and black pepper.


Make sure you add the vinegar to the water first.


The batter should stick to a spoon.


Set up your station so that it's dip, coat, lay down and on to the next.


Your chicken is ready to be fried.


You don't need a lot of oil. Use canola oil since it has a higher smoking point.


When you put the chicken in, lay it down away from you so that it the hot oil doesn't splash on you.

Cook until you see that the edges are golden brown and then flip.


It should be nice and golden brown.


Serve with thinly sliced cabbage and tonkatsu sauce.

Tuesday, June 1, 2010

Kabocha Salad

It's BAM 8 and I'm gonna roll out chicken katsu, kabocha salad, daikon miso soup and rice!

KuhBoCHa, is the mightiest of squashes. It's really great as a savory or sweet dish. This one is a mix of both, garnering the sweetness from the peas and raisins and the salty from the onions, mayo and sea salt. If you like potato salad but want to mix it up a bit, look no further.

Ingredients
3 cups of kabocha steamed, chopped and peeled. (about half of a medium kabocha)
1/4 cup + 1 tablespoon of light mayo
1/4 cup of raisins
1/4 cup of thawed green peas
1/4 cup of prepared and drained onion (approx. half a small onion)
1/2 teaspoon of salt for flavoring
1/2 teaspoon of salt for onions.

1) Pull out the seeds and wash well.
2) Chop kabocha into wedges and then into cubes.
3) Chop onions paper thin or use a mandolin. Put in a bowl with a 1/2 teaspoon of salt and set aside.
4) Steam kabocha on medium heat for about 10 minutes until firm and soft but not mushy.
5) Peel the skin off the kabocha using a knife.
6) Put in bowl and add mayonnaise and salt and mash. Feel free to leave chunks if you like it slightly chunky.
7) Rinse onions and squeeze out water.
8) Mix in raisins, peas and onions.


Pull out the seeds with your fingers.


Chop in wedges and then in cubes.


Chop the onion into thin slices, add salt and massage.


Let sit for 10 minutes and the onions should look limp.


Rinse onions with cold water.


Squeeze the water out.


Steam the kabocha.


Peel the skin off using a knife. It may be hot so place it on a cutting board and carve it off.


Add salt and mayo and mash the kabocha.


Mix in raisins, peas and onions and serve.